 Ecoerth Coupon Codes and Hosting Discounts for your Website Hosting Needs.

How to Install with Godaddy
If you’re new to creating websites or are transferring over to Godaddy from another web host, installing on your website can be a bit confusing.
Godaddy does not use the ‘hosting-standard’ cPanel, but instead uses a custom panel that Godaddy calls the Simple Control Panel. The name might sound ironic at first, but like any other interface, if you use it for a while it will begin to feel second nature.
For this guide we’re going to assume that you already have your Godaddy web hosting all set up and ready to go. Also, we’re going to assume that this is a fresh install, with no other content management systems like Joomla or Drupal already installed on your website.
Check out our round-up of Godaddy promo codes for 2019 (including $1.99 Domain Names!)to save you money on hosting, domain registration, and many other features
Step 1: Launch Godaddy’s Hosting Control Center
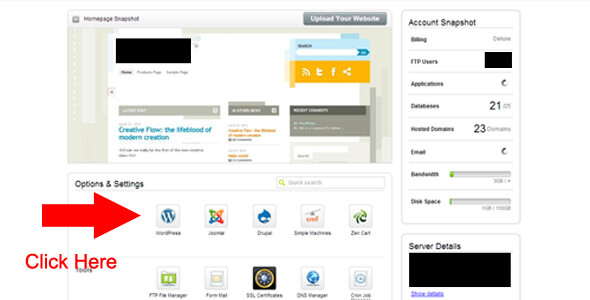
When you sign in to Godaddy, click on “My Account” and then go to “Hosting Control Center”.
You’ll know you’re there when a snapshot of the main website you have hosted on your server appears (see: above). Underneath that snapshot are icons for various content management systems that you can install on your website: WordPress, Joomla, Drupal, etc.
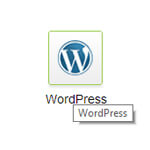
Click on the Icon
Step 2: Choose which domain on which you want to install WordPress

If you have many domains hosted on one server, then Godaddy will ask you to select which domain you want to install on. Note: you can only perform one install at a time.
Step 3: Set up Database for your website
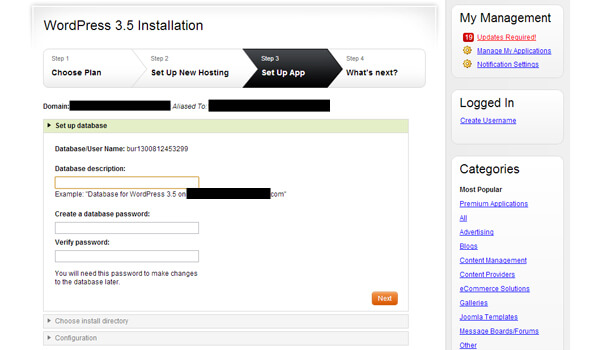
Every website needs a database. Basically a database is a location for all your website’s data. Godaddy will suggest a generic name like: database 1.23 for yourdomain.com. I tend to go with their suggestion. They also want you to create a database password. You’ll need this password if you want to use an FTP client later on when building your website.
Important! How to Avoid the One Error Most People Make When Creating Their New Website:
This is one error that people make time and time again. Unfortunately Godaddy makes it easy to make this mistake. In the next step it’s very important that when you choose the install directory for your website that you erase the ‘wordpress’ out of the url web address
Step 4: Choose Install Directory
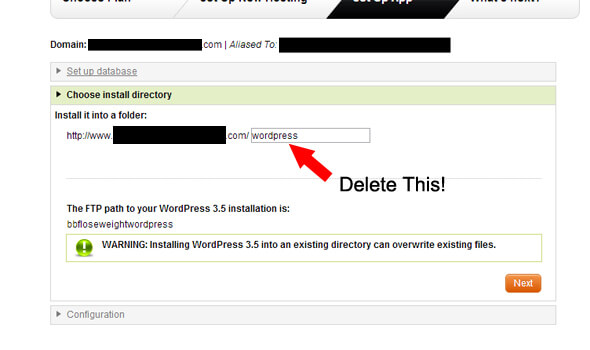
As stated above, when it asks you to choose the install directory, delete the suggested ‘wordpress’ out of your domain name. Why? If you leave it in, it means that your website won’t be at ‘yourname.com’, but ‘yourname.com/wordpress’. I have no idea why Godaddy makes it their default.
When I first started out, I made that same mistake and spent hours trying to fix it. I don’t want anyone else to have to make the same mistake.
Step 5: Choose Admin Name and Password for your Backend
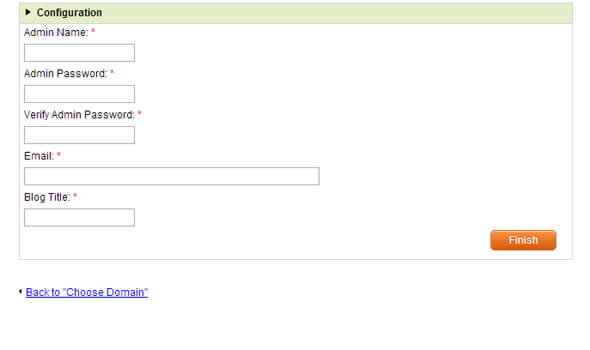
This is the username and password you will use to log in to the back end of your new website. So you need to make sure you remember these!
Step 6: Waiting Game
After you click install Godaddy will say that is installing on your website. It says to give them a couple hours, but Godaddy has been getting faster lately and the last install I did (three weeks ago) only took 15 minutes before the website is up and running.
Step 7: Visit Your New Website!
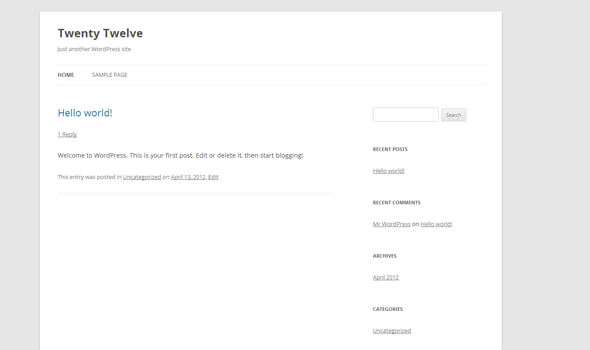
You can either: 1. Wait for a confirmation email when the installation is completed or 2. Go to your website and see if it’s ready. If you see the default theme (above), that means it’s up and running. Now you can log in to the Admin area and start creating!
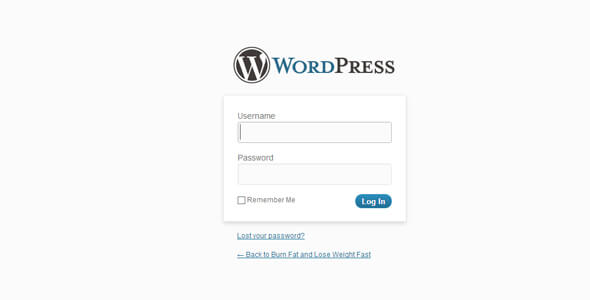
There’s two ways to log in:
- go to address bar of your browser and add to your domain name this: ‘/wp-admin’, so it’s ‘yourname.com/wp-admin’ and hit ‘enter’.
- On the bottom right there will be a widget that says “META” and underneath it “Log in”.
Both of these take you to the log in screen, which will look like this:
And the rest is up to you! I hope you find this post useful and helps you towards your dreams: whatever they may be.
Note: All images on this site are screenshots taken from Godaddy.com. Any personal information has been blacked out for our privacy and security.